Friday, February 8, 2013

Long time, no blog!

January was not my month. A combination of crappy weather, a bout with the flu and a bit of existential wedding-planning ennui brought my planning to a pause. "Meh," I would say, every time I passed the stacks of invitations waiting to be assembled or the piles of paper waiting to be turned into escort card flowers, "we've got plenty of time to do all that stuff. Later for wedding chores! Today I'll just watch 17 episodes of The Wire in a row."

Then February came, and along with it came the realization that we are four months away from The Big Day. Translation? It's time to Get Shit Done. I arose from the couch, shook off my protective cover of fuzzy blankets and Vicks Vapo-Rub and... walked over to the computer to surf Etsy for bridesmaids gifts. Hey, it's a start!

One good thing about January, though - my wedding shoes came in! After the DSW glittery dream shoes didn't work out, I bit the bullet and placed a custom order with Shoes of Prey. I had to face facts - my giantess feet just weren't going to slip into one of Cinderella's glass slippers. Even though I was nervous about dropping nearly three bills on some shoes, going the custom route was my only hope. I went to Shoes of Prey's website, designed something awesome and sent my order off with fingers crossed.

Within a week or two, I opened my email to find a picture of these gorgeous creatures, along with a note telling me that my shoes were on their way! I counted down the days until they arrived, sparing no chance to bug my office receptionist about whether my package had arrived. ("Bernard? Are they here yet? Are they here yet, Bernard?!")

"Your damn shoes are here, okay? So you can stop asking me now!"
I tore open the shipping box, untied the satin ribbon, lifted off the tissue paper and stared at the shoes in awe. They were even more beautiful in real life. Frantically, I kicked off my sensible flats and slipped my feet into the silver heels. Perfection! I've never had a pair of shoes fit like that in my entire life. And even better? They're so comfortable! I spent the rest of the afternoon prancing up and down the halls of my office looking for compliments. "Oh, these shoes? Why, thanks. They're custom."

The icing on the cake was the photograph, seen above, that Shoes of Prey actually prints out and tucks into your shoe box. Mine is currently posted on my bulletin board at work, so I can gaze at Shoes whenever I want.
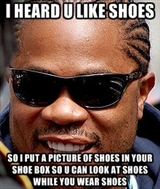

My thoughts exactly!

Sunday, December 16, 2012

If a bride falls in the forest...

...but nobody's around to blog about it, did it really happen?

Earlier this week, I received the (breathlessly anticipated) response to my application to become a Weddingbee blogger. Survey says? Reee-jected. Cue the sad trombone!

I took it pretty hard - a lot harder than I thought I would. Going into the application process, I knew that it was seriously competitive, and the chances of being accepted were pretty slim. But still, reading that email? I was crushed. The intensity of my disappointment was really surprising for me, and I decided it was time to take a step back and do some serious thinking about what wedding planning - and blogging about wedding planning - really meant to me.

I think it all comes down to approval. Gaining the approval of my loved ones has been incredibly important to me when making wedding decisions. It's affected everything from picking my colors (navy blue dresses are flattering on everyone!) to choosing to have a Catholic ceremony. I nixed the idea of glittery shoes after an off-hand comment from a bridesmaid about how tacky it was to wear sparkles after the age of fifteen. I decided against a cake topper I loved after my mom told me that it wasn't elegant enough for our venue. Even buying the dress - sure, I liked it, but what really swayed me was the fact that everyone else LOVED it. And those ridiculous tulle ballgowns I tried on? Maybe they weren't terribly flattering... but they made me feel romantic and ethereal and... like a bride. But no one else liked them. So we kept looking.

Being chosen to blog for Weddingbee would have been the ultimate approval, I think, which is probably why I craved it so terribly. A bunch of strangers think your wedding looks awesome and they like your style? Well, then it must be pretty awesome! The proliferation of wedding blogs - and my personal addiction to them - complicates things as well. It's easy to feel like if something isn't documented, written up and shared with strangers, then maybe it just wasn't good enough... and if your wedding doesn't make women all around the country drool and re-pin your photos on Pinterest, then you've pretty much failed your wedding.

But we all know that's not true - plenty of awesome weddings get blogged and plenty of awesome weddings don't, and as long as I end the day married to Mr. M, I haven't failed a thing. After all, weddings are about love, right? And Mr. M will love me even if the favors look like crap, and my mom and dad will love me even if we serve pigs in blankets at the cocktail hour, and my friends will love me in all of my tacky, glitter-heeled glory.

And that love? It's better than anything. Even a ten page spread in Martha Stewart Weddings.

Saturday, December 8, 2012

Suit-able

Earlier today, Mr. M and I met up with his best friend (and best man) at our local Men's Wearhouse to get our BOGO on. I'd found a nice medium gray suit online that would work out to be about $160 per groomsman, and all the guys were on board. We just needed to visit the suit in person - and figure out Mr. M and his best man's sizes - before pulling the trigger.

When we got to the mall and announced ourselves at the Wearhouse, the salesman told us that they didn't carry the suit we were looking for in that particular store. Bummer! But with a little bit of coaxing - I think he could tell we weren't going to be buying on the spot - he measured the boys and led us over to the racks to see what else was available.

I pulled a few contenders from the sea of gray suits - one lighter, one darker and one of the Vera Wang tuxedos just in case. The guys tried on the blazers, held up the ties, looked at themselves in the mirror and then looked at me expectantly. And... I went totally blank.

Uh oh, said my brain, I think we're supposed to have an opinion here. Is this our vision? Can you wear that tuxedo without a vest? Would charcoal look better than dove gray? Does this color look good with the ties I just dropped a Benjamin on? Yikes, I don't know! Maybe the salesman does....

"Um... do you think this tie goes with these suits?" I asked him.

"It depends on what kind of look you're going for," he replied.

Okay... I'll take that as a no! After a little bit more brow furrowing (from me) and posing in the mirror (for Mr. M and the best man) we thanked the salesman and left. I trailed behind the guys on the way to the Auntie Anne pretzel stand. All of a sudden, I was feeling really uneasy about this whole planning-your-own-wedding thing. Why did I buy those ties before we bought suits? Why didn't I ask one of my really fashionable guy friends to help me out with this? And how did I get to be thirty-one years old without knowing even the first thing about buying a suit for a man? Maybe I shouldn't have canceled that Cosmo subscription after all...

I started spiraling on the subway ride home. I don't think the blue ties match the blue bridesmaids' dresses at all. What if they don't? And what if the ties don't match the flowers? The ties are so preppy and the flowers are so soft and romantic... they're completely different styles! And the bridesmaids' dresses don't go with my dress! And my shoes won't go with anything! This whole wedding is going to look like I just closed my eyes and pointed at things! Aaaaarrrggh! Damn you, Men's Wearhouse! Damn you and your BOGO sale! 

But just as I'd worked myself up into the frothiest bridal froth I'd ever achieved, I stopped for a minute and looked at Mr. M sitting next to me. He hasn't been feeling well lately, but he still managed to drag himself out of the house and into a mall. In the middle of December. For me. Honestly, we could show up at the altar in pajamas and party hats and it would still be the best day of my life. All the rest of the stuff is just details, and it will all work itself out.... right?

(And hopefully, just in time for the next BOGO sale!)

Monday, December 3, 2012

A Wedding (Cake) Story

Last week, a friend of mine texted me out of the blue:
"Got hitched. Reception at my place, Saturday night. You in?"

Impromptu wedding celebration? Hell yeah, I'm in!

"Y'all got a wedding cake yet?" I asked. "Nope," he replied, "Feel free to bring one!"

That was all the excuse I needed. I put down the phone, picked up my coat and hustled over to the cooking supply store to pick up the necessary provisions - fondant, cake boxes and a teeny little flower shaped cookie cutter. I know it's totally crazy, but I have been fighting off this insane impulse to bake my own wedding cake. I know that a last minute DIY project is the last thing I need, and our venue would probably never even go for it, but... I totally want it! And I figured that baking this cake for my friends would probably give me a pretty good idea about whether a DIY wedding cake would be a complete disaster... or maybe not so crazy after all.

On my way home, though, I started to get a little nervous. Though I'm a pretty experienced baker, I've never even tried to pull off a tiered cake before - and my cake decorating skills, though improved through lots of practice, are still not the best. But hey - a free cake is a free cake, and one can only expect so much on twenty-four hour's notice. Besides, I had a feeling there would be enough champagne and good cheer around to make even the cruddiest cake look like Sylvia Weinstock herself decorated it!

One day, two-and-a-half pounds of butter and five zillion rejected fondant flowers later, I unveiled my masterpiece:


Okay, so I'm probably not getting my own Cake Boss-style TV show anytime soon, but it certainly could have been worse! The bride and groom were thrilled and the other guests seemed suitably impressed. Most important, the cake was delicious. I used a Smitten Kitchen recipe for the cake, which was perfect beyond belief - sweet, buttery and dense enough to hold up to stacking. In the interest of saving time, the frosting was a standard butter-and-powdered-sugar buttercream - not the velvety, indulgent French buttercream I usually whip up for cakes, but a whole lot easier to make. Final verdict? I'd call this mission a success... but now I know that I am definitely not up to the task of baking my own wedding cake. It's way too much stress for the week before the wedding - and try as I might, I just couldn't make it look professional enough to satisfy my tastes.

But would I do it again for another friend's elopement? Absolutely. Because getting paid in champagne is all right with me!

Tuesday, November 27, 2012

Strike a pose!

This week, we booked one of the vendors that I'm most excited about - our photo booth!

When we started planning our reception, I wasn't totally sold on the idea of having a photo booth. Sure, they're always fun - and everyone likes taking goofy pictures of themselves - but was it really worth the cost? Those suckers can be pricey! But after going to two family weddings this summer, each of which featured a photo booth with tons of props, I realized that the joy of taking group pictures with faux-mustaches and bowler hats was well worth the price. Lucky for me, Mama L came to the same conclusion!

"We have GOT to get one of these for your wedding," she said, as she wound the feather boa around her neck and selected a pair of oversized sunglasses for our third round of pictures.

Me and Pops at my cousin's wedding!
 As soon as I got back home, I started researching vendors. There were lots of choices, but we finally settled on my first choice: Magnolia Photo Booth Co.! They're a teeny bit on the pricier side, but they have a lot of really cool extras that seal the deal - like a coffee table book full of your photos from the event, free custom artwork for your photo strips and a box of ready-to-go props for your dressing-up delight. And the folks at Magnolia couldn't be nicer to work with - they're super prompt at returning emails and answering questions, and they all sound like they would be really fun to hang out with!

Me, Mr. M and Mama L at wedding #2!
 Which is a good thing, since we'll be seeing a whole lot of their attendant on the day of our wedding! Man, they're gonna have to drag me out of that booth. Think a faux-mustache will look good with my wedding dress? I do!

Tuesday, November 20, 2012

Yes to the dress, part 2

When I asked my two best girlfriends to be my bridesmaids, I was determined to be a cool, laid-back bride. "Don't worry," I told them, "you can totally pick your own dress! Whatever you want, as long as it's navy blue!" But as planning progressed and my bridal OCD intensified, I realized that I wasn't really into the mis-matched bridesmaids look. So I had to ask my friends if they would mind terribly if I went back on my word and had them wear matching dresses. They were remarkably cool about it, even after I added the caveat that they should be traditional bridesmaids dresses so that we could find matching dresses in juniors sizes for the junior bridesmaids. (But hey, at least I swore on a stack of Brides magazines that they could have total free range on shoes and accessories!)

Then came the hard part - picking a dress they would both like. (Or at least not totally despise.) Both ladies are gorgeous, but their styles are totally different. Bridesmaid J is into really edgy, high-end fashion, whereas Bridesmaid N has more of a relaxed, urban hippie kind of wardrobe. I was worried that they wouldn't both be able to find one dress in common...

But they did! We finally settled on this cute, flippy chiffon dress from After Six by Dessy:

Photo from RKBridal
I really like this shade of navy - erm, excuse me, "midnight" - and the chiffon selection for junior bridesmaids dresses is totally cute. The bridesmaids are both going to look seriously gorgeous in these dresses, and I think they'll each be able to bring their own unique style on board with their accessories - Bridesmaid J can wear some super-fancy heels while Bridesmaid N rocks some cute chunky sandals, and so on. Totally can't wait to see them walking down the aisle with me!

Friday, November 16, 2012

Our engagement photos have arrived!

And.... I shouldn't have worried so much.


I love them! Our swanky bar setting worked out beautifully, and a great photographer really does make all the difference.


My only regret is not taking pictures of my dress before wearing it! While it's really pretty and flattering in real life, it wound up doing some strange things in the pictures. Nothing a little editing can't fix... but damn, I'll never wear that dress for pictures again!


Aren't we cute anyway, though? Aww.... love!

Thursday, November 8, 2012

Let's get some shoes!

Oh, shoes. My best friend... and oldest enemy. As much as I salivate over gorgeous stilettos, sophisticated Ferragamo flats and hip, chunky-heeled sandals, I can almost never wedge my size 12W tootsies into any of them. For my girlfriends, shoe shopping is a fun, relaxing way to spend an afternoon... but for me, it's more like days of scouring the internet for something even remotely cute. So of course, I had to get a head start on looking for wedding shoes!

I knew I was in trouble the moment I laid eyes on the Kate Spade Charm slingbacks. Fuschia satin... multi-colored glitter... be still, my beating heart!


Unfortunately, this love was not meant to be. Even if I was willing to go all out and splurge on these shoes that I'll probably never wear again - except to work and the grocery store and while doing laundry and like EVERYWHERE, obviously - these works of art do not come in wide widths. 

Heartbreak! I briefly considered foot reduction surgery, but thought I'd give DIY a shot first. After all, a pair of fuschia slingbacks in my size can't be too hard to find, and I could always give them the glitter and Mod Podge treatment at home, right? Faux Kate Spade, here I come!

Inspired, I ran to Paper Source for all the necessary supplies. After dinner tonight, as I started laying down newspaper and rifling through drawers for masking tape, Mr. M stifled a groan. 

"What's the project this time?" he asked.

I yanked an old pair of heels out of my closet and held them up triumphantly. "I'm going to glitter my shoes!" I said. 

Mr. M backed away slowly. "Yeah.... great... glitter! Okay. I'll be in the bedroom playing video games if you need me. Uh... good luck with that."

"Pssh! I don't need luck," I replied, "these are going to be AWESOME."

Approximately five hundred coats of Mod Podge and glitter later:


Meh. I'm not in love. They're definitely sparkly! But the glitter is a little bit lumpy, the tape peeled off funny so all of the lines are uneven, and despite my best efforts, there are still little glitter-less patches here and there. These shoes might be okay for an evening at the club, where lights are low and people are drinking.... but I don't think I want to walk down the aisle in shoes that look like they were made by a moderately talented kindergartener.

Deflated, I went back online to see if I'd missed a potential shoe candidate in my earlier searches. And that's when I found this:

It's the "Romance" shoe from the Glass Slipper collection at DSW. It's not quite as stunning as my first love from Kate Spade, but it hits all the relevant marks - fuschia, glittery, slingback-ed and available in wide width! I snatched them right up, of course. They'll be here in a few days, so please cross your fingers for me! 'Cause if these don't work, I might have to investigate that foot reduction surgery after all.

Sunday, November 4, 2012

Paper Flowers Tutorial #2: "The Gardenia"

This next flower is really simple to assemble, once you get the hang of folding the center petal. I've been calling it the gardenia, even though it's really more of a rose. Hey, like I said before - I'm a bride, not a flower... talkin'... guy.

Um. Right.

Well, anyway, let's get started.

Step one: Punch out five large flowers. (I've been making the center petal gold, but you don't have to. That's just what I like to do!)


Step two: Take two flowers, including your the flower you'll use as the center one, and curl each petal diagonally. (The pink arrow indicates the direction you should be holding your curling apparatus.)


When you're done, your flowers should look something like the two flowers on the right here:


Step three: Curl the petals of the three remaining flowers towards the flower's center. (The green arrow indicates the direction you should be holding your curling implement - basically straight across the petal.)


When you're done, your flowers should like the three flowers on the left in the picture above.

Step four: This is the tricky part... and also the part that I forgot to take a picture of. Please refer to my handy diagram below to see how to turn the center flower into the center rosebud:


After you get each petal folded around it's neighbor, you'll have to hold the finished bud closed for ten to twenty seconds while the glue sets.

Step five: Apply glue to the second diagonal-fold flower shape.


Place the gold bud-shape into the center of the glued flower, then one at a time, fold up each glued petal and attach it to the central bud. In this step, you are pressing the flat part of each petal against the bud and tucking the curled part around the neighboring petal. The finished product should look like this:


(Again, you'll need to hold the petals closed for ten to twenty seconds while the glue sets.)

Step six: Take the remaining three flowers. (Fig. A)  Flip them over. (Fig. B)  Bend each petal towards the center of the flower and crease. (Fig. C)


Step seven: Assemble the gardenia by dotting glue in the center of each remaining flower shape and stacking them, remembering to affix each flower on top of the next with the petals off-set.


Almost there....


Getting closer....

Voila! Your gardenia is finished. Allow the glue to dry, then go in and add a little bit of extra curl to some of the petals with your fingers. Beautiful, no?


Friday, November 2, 2012

Paper Flowers Tutorial #1: "Lily"

After I'd researched all of the various ways that one can make paper flowers, and finally settled on the paper punch method, I got down to business - and found that making these gorgeous little flowers was actually pretty easy! Today, I'm going to do a tutorial on how to make the first - and easiest - of the five flowers. I've been calling this one "The Lily." (Even though I think it really looks more like a mum. But hey, I'm a bride, not a botanist.)

Step one: Remove cat from crafting table.


Step two: Gather your materials. I used the "Retro Flower" punch by EK Success in four sizes: XL, large, medium and small. You'll also need some glue - I've been using Paper Source's PVA glue, but hot glue would probably work, too. Finally, you'll need something fairly thin and cylindrical for poking and rolling. (Insert dirty joke here.) No, seriously though! I'm using an eyeshadow brush from Sephora, though anything relatively small and round will do.

For paper, I suggest using cardstock - it holds the curls and folds better, and will probably make a sturdier finished product. These flowers will all work with regular paper, too, but I prefer the look of cardstock.


Step three: Punch out your shapes. For the lily, you'll need two XL flowers, two large flowers, one medium flower, and two small flowers. I'm using shimmery gold paper for the smallest flowers to add a little bit of contrast, but you could keep it as monochromatic - or as multicolored - as you like.


Step four: Begin bending the petals inwards towards the center... like so:


Step five: Crease and release. Repeat until all petals have been creased.  They will look something like this:


Step six: Begin folding petals one by one down the center of the petal. 


They'll look like this when you're done:


Step seven: Take one of the XL flowers and dot the center with a little bit of glue. Place another XL flower on top of the first flower, making sure to align the petals off-set so they overlap each other like this:


Step eight: Keep going! Dot the center with glue, add the two large flowers, the medium flower and the two small flowers. Each time, make sure that you're positioning the flowers perpendicular to the previous flower.


As you build the flower, it gets more difficult to glue the smallest layers into the center of the lily - so use that poking tool to smush 'em down!


And.... ta-da! You've got yourself a paper lily!

Thursday, November 1, 2012

Family ties

As clueless as I can be about women's fashion, I am even more hopelessly clueless when it comes to men's fashion. Last weekend, I found myself asking strangers at Old Navy whether they thought a navy blue sweater matched the sort-of-gray, sort-of-olive khakis I was buying for Mr. M.

So it goes without saying that picking the groomsmen's attire has left me pretty stumped. The bridesmaids were so much easier - short navy blue dresses with straps, easy as pie! But the men's sartorial choices seemed endless. Tuxedos were too formal for our early morning wedding, but tan suits were too informal. Black suits? Too depressing. Navy suits might work, but then is that just too much navy all at once? And then there are all the different shades of navy blue to worry about - better to just nix the navy suits all together.

We finally settled on gray suits. Gray looks nice on everyone, and it's versatile enough that hopefully our groomsmen will be able to wear their suits again. We're planning on rounding up the groomsfolk during the next Men's Wearhouse BOGO sale and sending them out in pairs to buy their suits. (Nb: I'm not actually sure that this will work - does the free suit have to be the same size at the suit you pay for? If yes, this brilliant scheme will be foiled, since our guys are all different sizes.)

But hey, deciding on a suit color meant that I could finally get down to the fun part of dressing the guys: tie shopping! We're "gifting" the ties to the groomsmen, so we needed to find something affordable... but at the same time, you know, it's our wedding. We didn't want to skimp so much that the dudes had to walk down the aisle sporting some $5 sidewalk vendor ties. Luckily, we found the perfect solution: TheTieBar.com.


Their ties are fantastic, and every single one is just $15. They have extra-long ties and boy's ties, too, so we were able to get the perfect fit for every guy in our party. And, most important, they look and feel awesome - not cheap at all! (I know, I know... I totally sound like a commercial for The Tie Bar. But they really are awesome! And no, I wasn't compensated for this review. I'm just really excited about getting a good deal!)

The wedding party will be wearing the ones on the right; Mr. M will be standing out and looking gorgeous in the lighter pink tie on the left. Rrraowr!

Tuesday, October 23, 2012

Weighty Matters

Last week, Mr. M and I met up with our awesome photographer, Daniel Krieger, for an engagement photo session. We started out at our favorite swanky cocktail bar in Brooklyn, where the bartenders mixed us up some beautiful - and yummy - cocktails while Daniel took pictures. Then we headed out on a walk around the neighborhood, where the trees had finally burst into their full autumn splendor.

It was a good thing I had a drink or two, I think, because I spent a lot of the session really nervous about whether or not I would look extra-chunky in the finished pictures. While a lot of the time, I can look in the mirror and be happy with what I see, I really hate the way I photograph. I have a lot of bad angles, you know - pretty much everything that isn't a straight up Myspace photo shot from above - so I worried about almost every pose. A profile shot? Ugh, better suck in the stomach. Craning my head up to kiss Mr. M? Might as well just shine a spotlight on my double chin! 

While I've lost thirty pounds since our engagement, and I'm much happier about the way I fit into clothes and how much healthier I feel, taking our engagement pictures made me realize that I need to step it up on a couple of fronts before the wedding. First, I should probably stay the course with my weight loss program. With eight months to go before the big day, I can probably shed another thirty pounds - and hopefully, that will make me a little more confident about my body in general.

Second, though, I think it's important for me to get to a place of peace with my body. Sure, I've got a tummy and a pair of flabby arms and chubby cheeks that get extra chubby when I grin wide - but I've also got a fiance who loves me just the way I am and tells me I'm beautiful every day. That doesn't mean I don't need to continue to strive to be as healthy as possible - for myself, for Mr. M and for our future little M's - but I also need to stop obsessing about my imperfections. I can't help where the camera focuses, but I can control where I focus - on the love pouring out of Mr. M's gorgeous face, the tender way we hold each other, the beauty that he sees in me. 

Thursday, October 18, 2012

Paper garden escort cards

Once I had decided that paper flower escort cards was the way to go, I had to figure out how to make them happen without breaking the bank. Although they're one of the DIY projects that I'm most excited about, I didn't want to spend hundreds of dollars on pre-made flowers from Etsy or the pricey kits from Paper Source. I considered borrowing a Cricut machine from a friend, but after watching some instructional videos, I realized that it would take an awfully long time to cut out enough petals for 200 flowers with the Cricut. Yikes! Time to find a plan B.

I came across these video tutorials on YouTube and knew instantly that paper punches were the way to go! So I scampered on down to Paper Source to pick up some pink and gold cardstock and ordered four EK Success Retro Flower punches from Amazon - one each in XL, Large, Medium and Small. When they came in yesterday, I spent a good part of the evening following the video tutorials and doing a little bit of experimenting on my own. This is what I came up with!


Aren't they gorgeous?! I got through about fifteen last night. They're a bit time-consuming but not super tedious, and luckily we still have eight months before the wedding, so I think a few more crafting sessions (while watching Four Weddings, of course) should get the job done. When it's time to do the seating chart and write out the escort cards, we'll attach some little paper flags with everyone's name and table assignment. Scattered around our card table's display of ferns and jasmine vines, I think these will be absolutely beautiful! 

Tuesday, October 16, 2012

Love is a decision

This weekend, Mr. M and I attended our long-awaited (and long-dreaded) Catholic Engaged Encounter retreat. Long story short: it was amazing.

There were some parts we weren't crazy about, of course, like the creaky beds in our monastic cells or the stale croissants at breakfast. (Luckily, there was a McDonald's across the street! When we pulled into the parking lot of the retreat center and spied the Golden Arches, the knowing look that Mr. M and I gave each other was proof positive that we're a hundred percent perfect for each other.) But the weekend's bright spots eclipsed the not-so-hot ones by far. Some of the bonding we did was over silly stuff - like sneaking out for breakfast at 6:30 a.m. before anyone else was awake, or Mr. M crawling out onto the balcony to let me into my room after I accidentally locked myself out of it. But most of it was real, honest, emotional re-connection.

Living it up, monk style!
Our fellow fiances and fiancees were a smart, honest, fun group of people. Though most of the work we did was just with our own intended, there was a group session on Saturday night where we all sat around in a circle and discussed relationship issues that we'd written down and stuffed in the anonymous questions box earlier in the day. There was a really broad range of experience in the group, and it was really cool to hear other folks' thoughts on some things that come up in a lot of marriages. The two older married couples who led the discussions throughout the weekend were also fantastic. They did a lot of very honest sharing about their lives together, and I really appreciated their willingness to open up and tell us about how they have worked to create successful, happy marriages.

I was nervous, before the weekend, that Mr. M and I would be put through some sort of Spanish Inquisition about our living arrangements or subjected to a lecture about burning in hell if we ever even thought about using contraceptives, but that kind of thing never really happened. There was a discussion about Natural Family Planning and a couple of mentions in the written materials about the supposed benefits of not living together before marriage, but the judgement I expected was nowhere to be found. (Phew!)

All in all, the time we spent there was worth every minute and every penny. We loved it so much that we signed up to volunteer to be one of the presenting married couples someday in the future! It was so lovely to take some time out from our daily lives and just share with each other. I couldn't recommend it more highly!

Friday, October 12, 2012

Close Encounters of the Engaged Kind

Mr. M and I are packing up to go on our Catholic Engaged Encounter this weekend. I'm looking forward to it - but I'd be lying if I said I wasn't a little nervous!

Engaged Encounter is a weekend-long retreat that the church offers as an alternative to the traditional pre-cana classes. We'll be staying at a retreat center in deep, deep Brooklyn, sharing dorm rooms with a same sex roommate and spending the weekend learning about married life from other Catholic married couples. From what I can gather, we'll be doing a lot of writing and sharing with each other rather than with the whole group, which takes a little bit of the edge off! But still... it definitely takes me out of my cozy comfort zone to be sharing a room with a stranger... and possibly sharing things about my relationship with a big group of people I don't know!

But at the end of the day, I think it will be a good experience. Mr. M and I have pretty awesome communication, if I do say so myself, but there are always more things to talk about. And I've heard that EE is actually a really wonderful experience. Some of my friends have gone through it, and they say that it's really strengthened their bond as a couple and brought up a lot of discussions that might not have come up otherwise. Mr. M and I share a lot of the same values and dreams for our future, and I think we've pretty much covered all of the relevant topics on our own: the timing (and raising) of future little Ms, our financial goals, our feelings on the topic of divorce, our respective childhoods. But who knows? There is always more to learn.

So wish me luck!

Thursday, October 4, 2012

Put a ring on it! Part 2

On a very long and drizzly ride back home from a cousin's wedding in upstate New York a few months ago, I spotted an outlet mall with a sign for a Zales outlet along the highway. Discount jewelry?! "Pull over!" I shrieked. "We need wedding bands!"

Turns out, outlet doesn't really mean what it used to. Mr. M and I tried on a bunch of rings, but the prices seemed comparable to a regular Zales store, and even with the slight discount, we didn't feel moved to buy anything. On the bright side, though, we did make some decisions about the styles we like! Mr. M fell in love with a tungsten band with black detailing and I realized that my engagement ring's setting meant that I would either have to get a curved wedding band or rock a considerable gap between the e-ring and the wedding ring. I liked the curved look a lot more than the gap, and when the saleswoman showed us how it would look with two curved diamond bands - one on either side of my engagement ring - Mr. M and I were both sold. Sparkles and curves was the way to go.

Back home, I started looking for the perfect curved band, and I found it at OroSpot!

Picture from OroSpot website
It was not only just the right amount of bling, the price also sounded pretty excellent. Last night, we pulled the trigger and ordered it! 

I can't wait til it arrives - I'm totally going to put it on and start prancing around, practicing for married life. "Oh, this ring?" I'll say, "it's my wedding band. My husband bought it for me!" 

At least until my friends start giving me those "you're crazy" looks, of course. Then I'll tuck it back into the box and put it away until the big day in June. 

Wednesday, October 3, 2012

Put a ring on it!

There's already one ring on it, of course - my engagement ring. But in a little less than nine months - yay! - it'll be time to add another one - the wedding ring! 

But before we get to that, let me take you back to the day we bought ring #1. Mr. M and I had been discussing marriage for a while, and he told me that he'd like to propose around my birthday in January. He also said that he really wanted me to pick out the ring myself, since he's not much of a jewelry fan and I'm... well... picky. After nixing the idea of buying a ring at a chain store like Zales or Kay's, and being somewhat terrified at the prospect of wandering around the Diamond District with a wad of cash, we decided to go visit my parents for a weekend and take a trip to my family's favorite independent jeweler. 

On our way to the jeweler, my mom mentioned that she'd seen some really beautiful rings at Sam's Club. I had a hard time believing that they'd have anything worth looking at, but Mr. M and I agreed to go check it out. (I was secretly hoping to be able to prove her wrong!) So we waltzed up to the jewelry counter at Sam's and started looking at rings in our price range. Some were pretty, but I was mostly unimpressed... until I saw The One. 

Holy sparkles, Batman! It was beautiful - a simple white gold band with a beautiful .58 carat round diamond surrounded by smaller diamonds in what they call a "unity" setting. Although they were all graded I1, I couldn't see any visible inclusions, and whatever was there definitely didn't take away from the beauty of the ring. Because of all the facets clustered together, it sparkled like crazy - and the halo-like setting looked perfect on my big ol' size 11 ring finger. Was this it? Was this my ring?
Picture from the Sam's Club website - which really doesn't do it justice!
I couldn't decide. To be totally, brutally honest, I was having a slight snobbery attack. Could I really rock a ring from a big box store? I had to think about it some more, so we left Sparkles there and continued on to the family jeweler. Once we got there, we gave them our budget and started looking at our options. Long story short - we could really only afford a small-ish diamond in a very plain setting. While I truly think that "smaller" diamond solitaires are gorgeous, classic, beautiful rings - I did have the size 11 finger to think about. A half carat solitaire that would look perfect on a smaller hand looked like a tiny chip on my large finger. 

Thus, the decision was made. We hopped back in the car, went straight back to Sam's Club and purchased Sparkles. I haven't regretted it for a moment since. I still get that "squee!" feeling every time I look down at my hand! And my snobbery attack passed quickly - every time someone admires it, I proudly tell them, "Sam's Club!" We saved some money and got a truly gorgeous piece of jewelry - what's not to be super proud of? 

Friday, September 21, 2012

Vacation, all I ever wanted!

I absolutely love to travel. I love being in an airport in the morning - the buzz of zillions of travelers on their way to a destination, the well-stocked magazine racks, the rumble of suitcase wheels, the crappy overpriced coffee. I love thumbing through my passport and reminiscing about all of the places I've been - eating warm croissants in Paris, hiking the mountains of Cinque Terre in Italy, spending the night on an uninhabited island in Panama. I love going to someplace new and trying to live like a local. Experiencing another culture is one of the most amazing things in the world, and I'm lucky to have had so many incredible trips to so many wonderful places.

That said, when Mr. M and I started planning our honeymoon, we both agreed that we wanted something completely different - an all-inclusive tropical vacation with nothing but sand, sun and an unlimited supply of fruity cocktails. Forget living like a local, forget about exploring and experiencing local culture - we wanted to plant ourselves at a swim up bar for a week or so and just chill out.

I did some research, consulted a bunch of friends for suggestions and looked at resort websites until I was cross-eyed. Did we want in-room whirlpools in Mexico? Swim-up suites in the Dominican Republic? Five days somewhere super luxurious or ten days in a cheaper version of paradise? After some discussion, we both agreed that our must-haves were an all-inclusive adults-only resort with good reviews and plenty of yummy food options. Oh, and that swim-up bar. Totally non-negotiable.

So as soon as we came across the Couples Resorts, we knew we'd hit paydirt - and booked our honeymoon at Couples Swept Away in Negril, Jamaica! Adults only? Check. Great reviews? Check. Swim-up bar? Oh, we've got your swim-up bar! The best part was that the prices were so reasonable, we were able to book the honeymoon of our dreams: ten days long. 

Photo from Couples.com website - hello, beautiful beach! Hello, hammock!
Ten days of palm trees and sand, of sunscreen and rum punch, of reading crappy novels on the beach and eating jerk chicken and having nothing to do but spend time with each other... oh man, I can't wait! 

The best part for us so far has been Couples' Love Away plan. We put down $100 to reserve our rates, and every month between now and next May, we put another $100 towards our balance. They also have a best price guarantee, which meant that when better rates popped up last month, I was able to call and immediately switch our package to the new cheaper rates. (We saved close to $700!) 

When I'm having a rough day at work now, I just pull up the Couples website and indulge in a little bit of daydreaming. I'm all, wedding? What wedding? I'm looking forward to the honeymoon! 

Monday, September 17, 2012

Hello, gorgeous!

I've never been much of a make-up girl. I'm envious of women who what to do with cosmetics - they always look so put together! My grooming standards tend to be a lot lower - as long as I've brushed my teeth and I'm wearing pants and a shirt, I'm pretty much ready to go. I've been trying to step it up a little bit more lately, putting some more thought into my outfits and making sure I blow out my hair in the morning and put on a little foundation, but I'm still an absolute beginner when it comes to the world of make-up. 

Which is why I was super grateful to meet Elizabeth Black, who came over this weekend to do a pre-wedding make-up trial. She really knows what she's doing! A little airbrush here, a few false eyelashes there, and I was a significantly prettier version of myself. Check it out:

Hello, gorgeous!
After thirty-something years of mostly seeing myself sans eyeliner, I was worried that the drama of wedding day make-up was going to make me feel like a drag queen. But Elizabeth's work was awesome - she made my blotchy skin look porcelain and just perfectly flushed, opened up my eyes and somehow magically found the only shade of lipstick that has ever actually looked good on me. Magic!

And check out those eyelashes!
When I win the lottery, I am so hiring her to come do my make-up every morning. Until then, I'll just have to look forward to seeing her again on my wedding day! 

Friday, September 14, 2012