Um. Right.
Well, anyway, let's get started.
Step one: Punch out five large flowers. (I've been making the center petal gold, but you don't have to. That's just what I like to do!)
Step two: Take two flowers, including your the flower you'll use as the center one, and curl each petal diagonally. (The pink arrow indicates the direction you should be holding your curling apparatus.)
When you're done, your flowers should look something like the two flowers on the right here:
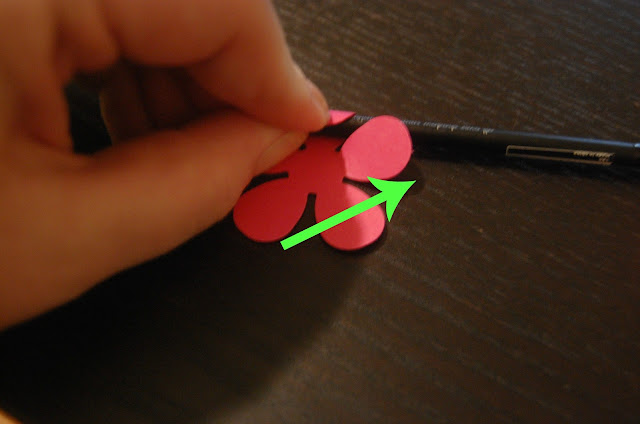
Step three: Curl the petals of the three remaining flowers towards the flower's center. (The green arrow indicates the direction you should be holding your curling implement - basically straight across the petal.)
When you're done, your flowers should like the three flowers on the left in the picture above.
Step four: This is the tricky part... and also the part that I forgot to take a picture of. Please refer to my handy diagram below to see how to turn the center flower into the center rosebud:
After you get each petal folded around it's neighbor, you'll have to hold the finished bud closed for ten to twenty seconds while the glue sets.
Step five: Apply glue to the second diagonal-fold flower shape.
Place the gold bud-shape into the center of the glued flower, then one at a time, fold up each glued petal and attach it to the central bud. In this step, you are pressing the flat part of each petal against the bud and tucking the curled part around the neighboring petal. The finished product should look like this:
(Again, you'll need to hold the petals closed for ten to twenty seconds while the glue sets.)
Step six: Take the remaining three flowers. (Fig. A) Flip them over. (Fig. B) Bend each petal towards the center of the flower and crease. (Fig. C)
Step seven: Assemble the gardenia by dotting glue in the center of each remaining flower shape and stacking them, remembering to affix each flower on top of the next with the petals off-set.
Almost there....
Getting closer....
Voila! Your gardenia is finished. Allow the glue to dry, then go in and add a little bit of extra curl to some of the petals with your fingers. Beautiful, no?


Hi,
ReplyDeleteI am putting together romantic "how we met stories" on my blog,
"So...How Did You Meet Anyway?"
http://wwwsohowdidyoumeet.blogspot.com
I have received and posted over 200 stories...many from "bees" such as you!
I am always shopping for new stories and I would like to add yours. Please check out the site, and if you would like to contribute your "how we met" story, contact me at;
susan.amestoy@gmail.com
And if you would like any more information
here is a link to a television interview I did recently.
http://www.wcax.com/story/14708398/author-collecting-love-stories
Take care and...congratulations!
Susan